Tuesday, 8 March 2011

Plumb Crazy

Next job after the engine bay electrics is to install all the cooling hoses and ancillary bits and pieces. This begins with the crankcase breather bottle, the radiator and electric fan, then the primary water reservoir:


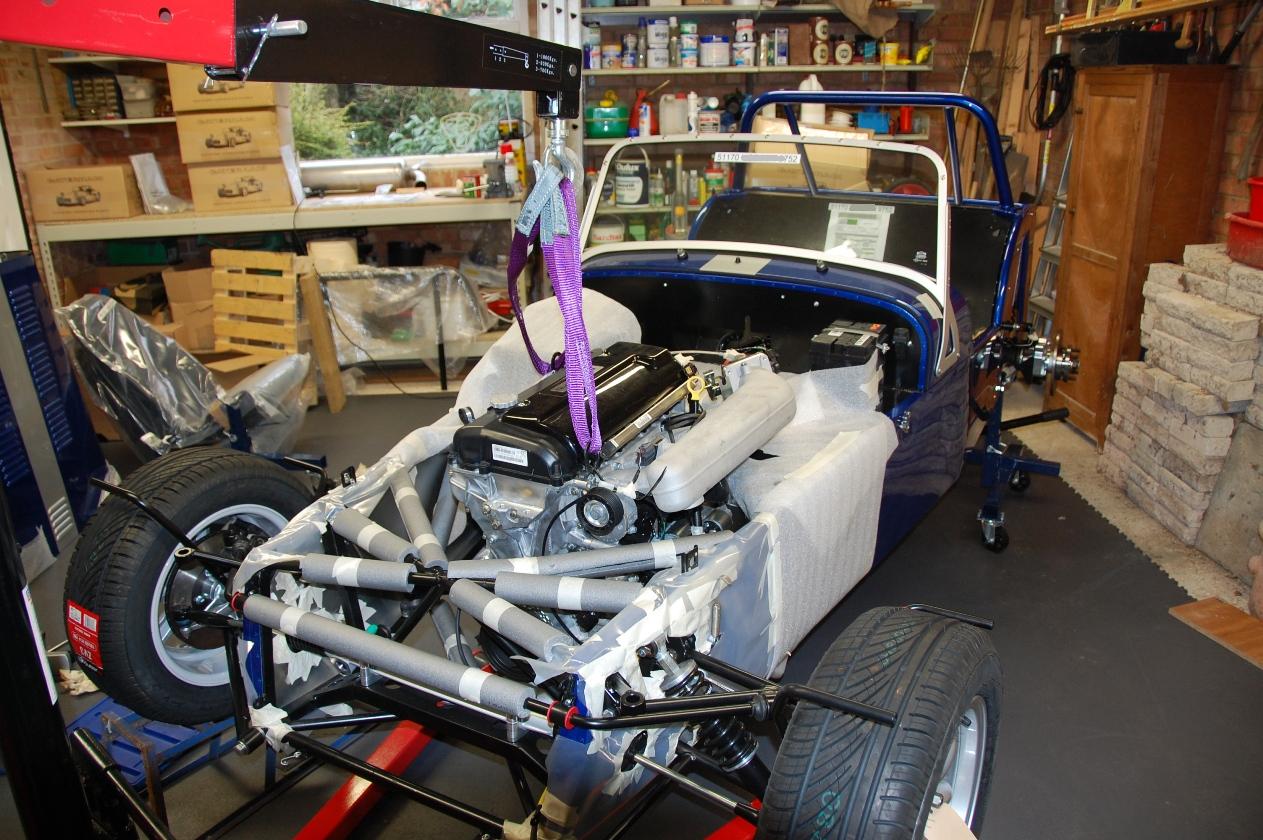
This was all quite straightforward. Then came all the hose connections, which was a bit more tricky... trying to decide which hose went where, and cutting them all to the right length, was a bit of a jigsaw puzzle. Thankfully a friend at the Lotus Seven Owners Club forwarded me some photos from Sean at CC, showing how the hoses ought to be routed - this made life much easier, but I still had to be a little creative with the routing of the hoses around the heater area. Firstly these hoses foul on the engine air inlet filter, and secondly routing the hoses down to the oil cooler 'modine' unit was difficult due to the ever-present washer bottle (which seems to get in the way of everything!). Anyway, I think I've got all the waterworks sorted now:


The heater control cable went in OK, and then I went around with a bunch of cable-ties making sure all the hoses were located tightly and not flapping about in the breeze. There was only just enough hose to go around, by the way, and I also had to buy a couple of spare 25mm hose clips.

Final job in the engine bay was to install the throttle cable, which I thought was going to be easy but turned out to be a bit of a pain. Firstly the throttle pedal didn't have a slot in it for the throttle cable to fit through, so I had to get the hacksaw out (always a bit worrying when you start cutting bits off a new car, and you're not quite sure if you are doing it correctly!). Secondly the throttle cable seemed to be a couple of inches too long to be able to adjust correctly. Scratched my head for a while over this one, until I noticed that pedal mounting bush had been bolted on the wrong hole (there are two possible threaded holes in the footwell!). Anyway when I changed to the alternate mounting hole everything lined up OK and I could adjust the cable tension correctly to get the full range of motion on the inlet diaphragm.

Job's a good 'un!

Next thing in the manual is to actually fill up with anti-freeze mixture, but I think I'll leave that until later on in the build process, and move onto the rear suspension.

Total work hours so far: 55

Thursday, 3 March 2011

Engine Bay Ancillaries

After the engine install, then comes the big connecting-up operation! Actually the first thing I had to do was move the washer bottle bracket over an inch - the factory had put the bracket in a location where the bottle fouled on the starter motor. Doh! After drilling out the rivets, I re-fitted the bracket in a better place. Then I set about fixing up the various electrical connections to the engine: ECU, MFU, sensors, etc. The MFU had to be fixed to a bracket rivetted to the battery tray/holder strap, which is stainless steel and was bloody difficult to drill through...


I've bolted the battery cables & earth straps in places where I think it makes sense, I guess I'll know if this is good enough when I try and start the engine! There's still a couple of loose wires yet to connect up - water temp sensor, rad fans etc., these will be done in due course.

Next I bolted the exhaust pipes on, after removing the sticky paper labels (to avoid the disturbing burning smells when the engine is first started!). This was a fairly straightforward process, note that it is very important to protect the bodywork orifice with card or foam to avoid scratching. The first 3 pipes went in OK from outside-to-inside, but the 4th pipe I could only locate by manouevring it from inside-to-outside. The collector/cat unit slipped on easily, then I supported it's weight whilst tightening up the pipes on the exhaust gasket and making sure there was even space around the pipes and bodywork hole. Finally the 2 spring units were coaxed on, holding the cat unit to the pipes. Point to remember - the hooks on the pipe & cat need to be "knocked in" after fitting the springs, for IVA purposes (according to the Caterham guide).


I'll put the silencer box and the heat shields on when I've done the rear wheel arches.

Next the gear lever and reversing switch went in. I have to say that I felt a bit of a tingle when first moving the gear lever around in the gate - I'm so looking forward to doing this many times in the future!


Finally for this section, I installed the steering column and wheel. This was not really feasible before the engine went in, and in fact I'm glad that I waited until after fitting the exhaust pipes as well. It would have been very tough fitting the pipes with the column in the way.

The lower column and UJ goes in first, then the upper column and joining bracket. The upper column was tough: The rubber & plastic bushes are tight in the column surrounding tube, and it is easy to knock them out of place if you are not careful. Also, I belatedly realised that my quick-release Momo wheel only goes on at a specific rotation angle - you need to line up the steering straight forward, with the lump on the column splines in exactly the right place. I had to re-adjust the lower column UJ spline bolts a couple of times to get this spot on. The wheel looks really good in situ. This bag of bolts is beginning to look like a car!


Next week I will move on to the plumbing & heating...

Tuesday, 22 February 2011

Engine Installation

The first thing to acquire before starting the engine install procedure is a suitable hydraulic hoist and sling. I managed to get hold of a Sealey PH10 crane and 1 tonne / 2 metre sling, and this worked out perfectly.


The engine install is definitely a 2-person job (minimum!), and I was ably assisted in this task by my mate Bob. First thing we did was to lift up the engine to the appropriate height and offer it up to the front of the car. It immediately became apparent that the legs of the crane would foul the axle stands supporting the chassis, so we decided to simply put on the two front wheels and raise them up on wheel ramps. This gave ample space for the crane.

My assistant Beaker (sorry Bob)

Manoeuvring the engine into place and dropping it down into the bay was actually a lot easier than we had expected - the most difficult part was making sure the tail end of the gearbox fitted in above its support bracket on the chassis. We used the trolley jack underneath the car, to support the back end of the gearbox at the correct height as we dropped the front of the engine down. Almost no fouling of parts occurred: only the washer bottle had to be taken off, plus an alternator bolt that I had mistakenly left in situ.

It's in!

The most difficult part of the whole operation turned out to be the fitting of the various engine mounting bolts. Taking the weight of the engine on the crane, we first loosely bolted on the two main engine mounting struts and checked alignment with the rubber chassis bushes. It looked OK, so I tried to put in the right-hand-side long mounting bolt. This promptly cross-threaded, because the engine was actually canted over slightly. It was very tricky to get the engine at the correct angle with the bolt also lined up on the bush, so what we ended up doing was removing both the mounting strut and the rubber bush from the chassis, bolting them together off the car, and installing them as a pair using the slack in their own long bolts to line it up. This was a lot easier. The rear two bolts on the gearbox mount went in fairly readily, and we lined up the gearbox by eye centrally in the transmission tunnel before tightening up.

Total time for the engine install was a shade over two hours - very pleased with that. Off to the pub for a pie and a pint (or a burger and several pints, to be more exact).

Friday, 4 February 2011

Gearbox & Engine Prep

First, the gearbox needs to be bolted to the bell-housing & engine. The bell-housing was delivered already bolted to the engine, with the gearbox as a separate unit (NB. I ordered a regular 5-speed box). So, first job was to unbolt the bell-housing from the engine, connect to the gearbox, and re-bolt to the engine. No problem.


Don't forget to check the clutch release bearing hydraulic pipe connection is tight before re-fitting the bell-housing to the engine! You don't want to have to remedy this later...

Now - moving on to the engine installation. With the Ford Duratec 2 litre engine, you are supposed to use the R400 chapter in the Caterham Assembly Guide. This chapter is roughly accurate, but contains many "ambiguities"....

There's quite a lot of ancillary bits & pieces to get sorted out before the actual engine install. First off, the windscreen washer bottle and pump needs to go in (all mod-cons in the Caterham!). The metal mounting bracket for the bottle was already installed by CC in my engine bay (excellent! I wasn't expecting that...) but I had to route the water pipe from the pump to the windscreen jet. No problem here, except negotiating the pipe through the wiring loom grommet in the transmission tunnel, which was a bit fiddly.


Next, the manual says you have to connect the water rail and L-shaped rubber hose to the engine. I couldn't find either of these items in my kit, so a quick email to Sean confirmed that they have changed the design and these parts are not necessary. I proceeded onto the rubber engine mounts....


Note that it is important to scrape off the black paint on the LH mount, which also contains the engine electrical ground strap. After the engine is installed and this bolt is tightened, I will cover it in copper grease to try and prevent corrosion on an important electrical contact.

Horns go in next, and I used a couple of large penny-washers on the brackets because the holes were a little too large to just bolt down.


Next job is to protect as much of the engine bay as possible with padding, in order to avoid scratches and dents when the lump is shoe-horned in. I used a mixture of 15mm pipe insulation and 2.5mm foam packing wrap.


Last but not least, I removed from the engine all the items which I thought would get in the way during the install: The two main mounting brackets, and the alternator & belt. The guide says you should remove the starter motor as well, but having read a lot of other people's build diaries this does not seem to be necessary.


Now: all that is missing is my drinking pals, who have kindly offered to lend a hand with the engine installation (in exchange for sundry beverages).

Total build time so far: 25 hours

Saturday, 29 January 2011

Front Suspension

Right - spanners at the ready, let's build a car!

First job in the Assembly Guide is to protect the whole front-end paintwork of the car prior to assembly of the front suspension components. This took over an hour - I used thick polythene sheet and masking tape. The first proper mechanical install is the steering rack - no problem here, except they have improved the design of the mounting bolts so you don't need the washers mentioned in the Guide. Note that the steering column and wheel don't get put in until after the engine install, and you must leave the bolts on the rack loose for the moment.


I was slightly confused about the PVC boots on the track-rod ends, until I realised that the ones supplied in the kit have to have their ends sliced off with a Stanley knife in order to fit.


Next the lower wishbones are installed, with copious copper-slip grease. Again no real problems - instructions are clear and precise. Front hubs and upper wishbones are next, but if you have the ventilated disc & 4-pot caliper option (the salesman talked me into it) then remember to install the brake pads first before building up (the cycle wing support bracket covers the brake pad locating pin).


The only confusing part of this section was the headlamp mounts - Caterham have switched to the "EU4" style which is not covered in the Guide. The new bracket fits over the front-top wishbone mount, but you need a couple of extra 10mm flat washers to pad out the bracket and make a tight fit. Installing the spring/damper units was quite a struggle: I used a soft-head hammer to knock the top bushes into place, but I have had to order some special hexagonal-drive sockets to be able to torque the damper Allen bolts correctly.


Final job on the front suspension system is the installation of the front anti-roll bar. The bar is supported by brackets on the chassis front, but the actual bar-ends have plastic balls screwed into them which locate into sockets on the top of the upper suspension wishbones. It was fiddly getting the plastic balls to sink into the sockets - First you need to bend the roll bar to get the balls roughly in the correct place, then work the bar up and down a few times to make the balls enter the sockets correctly. Rubber boots are cable-tied over the joints to prevent ingress of crap.

  
Last job in this section: connect the flexible brake pipes between the disk calipers and the copper pipe unions inside the chassis. Only problem here is guessing how tight to make the joints...


Engine & gearbox next.

Arrival


(References to "The Prisoner" are part-and-parcel of any Caterham/Lotus 7 discussion!)

The scheduled delivery date for my Caterham kit was the first week of December 2010. Unfortunately  nature stepped in and dumped a load of snow on southern England - I think the Caterham factory actually had to close for a few days. I was going away on vacation in the weeks before Xmas, so we decided to delay the delivery until the New Year.

So, first day back at work in 2011, and there's a big van outside my house...


I went outside to say hello, only to find the Caterham delivery driver deep in conversation with a local guy in a beat-up old Land Rover Disco, who claimed the Caterham van had clipped his rear bumper in the narrow lane outside my house. It all ended amicably though - the Disco was falling to bits anyway, and the driver admitted that the Landy was an MOT failure...


(Check out the personalized plate. On the van, I mean...)

Cup of tea later and the driver & I set about unloading the boxes and various bits and pieces. Note to anyone else thinking of doing a build - Gravel drives are not ideal for small-wheeled barrows! The two of us had to hand-carry the engine 20 metres to the garage, nearly did my back in. Here's what I had after the driver left:


The first few days after delivery were occupied with a good check through the various boxes, to make sure everything was present and correct. Caterham are slightly notorious for forgetting the odd few bits and pieces... There are a number of lists and photos in the Assembly Guide to help with this process, but unfortunately the Guide is not exactly up-to-date ("guide" is the correct description for this document) and some of the items vary depending on what spec of car you have. Sean at Caterham Cars is your best mate now, he'll sort out any shortages pronto.

Friday, 28 January 2011

Preparation

Before choosing the exact Caterham model that I wanted, I rented a Roadsport 175 SV for the day from Mark On Europe in Swindon. I went there rather than direct to Caterham because I wanted to drive 300 miles or so on nice country lanes - and I know Wiltshire / Somerset / Dorset rather better than south London! Anyway, the guys at Mark On Europe were very friendly and helpful, and I had a fantastic day out in their 175 SV. It was a beautiful spring day in late April: sunshine, speed, and the wind in what little hair I have left. Seven heaven.


The week after my test drive, I went up to Caterham to talk about engine options and have a good look at all the different colours etc. There were a lot of cars in the garage at the time, all different shapes and sizes, so it was easy to compare the different options. I sat in a couple of the non-SV cars, they were too cramped for my liking. I chose the 2.0 litre Ford Duratec engine which I had used the previous week, it is plenty powerful enough to get me into trouble...

The final question was colour scheme. I was quite tempted by the "traditional" Prisoner colours (green and yellow), but that almost seems too common these days... I saw a picture on the Caterham website of the Gulf Oil scheme in light blue & orange, which I thought looked really cool, but there was a car in these colours at the Caterham garage when I visited and unfortunately I didn't think it looked quite so good in the flesh. So I chose the metallic Viper Blue instead, with a silver noseband & stripe.


So the car went on order in May 2010, and I was quoted a delivery date of December. That was fine, it gave me several months to clear out my garage and make all the preparations. A couple of things I would recommend for anyone contemplating a Caterham build:

1) Garage flooring: A nice, clean, even floor in the garage makes the build a whole lot easier. I chose to put down some 5mm vinyl tiles, these are a little pricey but are simple to lay, very comfortable to kneel on for long periods, and easy to roll the car, trolley jack, and engine hoist on. Dark colours are recommended, because over time they can get stained by black tyre rubber. http://www.paftektiles.co.uk/

2) Mobile axle stands - I've found these very useful. You can easily move the car around to access any part, they are very stable, and you don't need to worry about accidentally knocking the car off the stand.
Check out http://www.cjautos.site90.net/mobax.html

Here is my garage before any work commences:


On the Caterham website you can download the Assembly Guide, this is quite useful because it lists the tools and lubricants you will need and you can get these in advance of the kit arriving. They also have a "first fill pack" available on the website spares page, containing all the different oils and anti-freeze etc. I ordered one of these to be delivered with the kit. I didn't need too many special tools - Just a humungous torque wrench and 41mm socket for the hubs, and a few other small items.

Then the waiting began...